


I’ve fallen head over heels in love with resin crafting. If you haven’t discovered the art of resin crafting, you’re missing out! Almost anything can be placed in resin epoxy.
This includes fragile items like paper, sprinkles, and food items like cereal and candy.
One of the first and easiest projects I did was creating resin numbers.
Resin numbers and alphabet letters are all the rage right now because they provide an excellent learning tool for school-aged children.
It allows them a more engaging and interactive experience for learning number recognition and counting.
If you have a toddler or preschooler on your hands, resin numbers are a must for learning to count!
However, if you’re a beginner at resin art, it’s a little daunting.
Take a deep breath and let me show you how to make resin numbers!
Disclosure: Bear in mind that some of the links in this post are affiliate links and if you click on them to make a purchase I will earn a commission. Keep in mind that I link these companies and their products because of their quality and not because of the commission I receive from your purchases. The decision is yours, and whether or not you decide to buy something is completely up to you.
How To Make Resin Numbers
When you’re just dipping your toes into resin crafting, making numbers provides a quick and easy educational tool for learning how to count and number recognition.
Plus, if you stick to your child’s favorite color or a theme like dinosaurs your child is sure to be engaged and ready to learn!
Here’s all the steps you need for how to make resin numbers:
Step 1: Gather your supplies
A beginner only needs a few supplies to get started with epoxy resin crafting.
Since you are making resin numbers, I show you the essential list of supplies you will need for making resin numbers.
Epoxy Resin– The type of epoxy resin you need is one with a part A and a part B. This is the epoxy resin I’m using right now for all my projects and I love it! It has a 40 minute work time and it really does.
Resin Number Silicon Mold- For holding and shaping the resin.
Cups– Disposable plastic cups or silicone cups with stir sticks. I highly recommend going with silicone! They can be used again and again and they are super easy to clean.
Drop Cloth/Silicone Mats– Messes do happen with resin no matter if you’re a beginner or not. I do consider resin crafting to be a messy art craft.
Disposable gloves- A must! Do not try to work with resin without gloves on. It is extremely hard to get off your skin! However, if you forget or still manage to get resin on your skin use nail polish remover to remove it.
Extra’s- Anything you want to add to the resin… Glitter, dried flowers, sequins, sprinkles, and more.
Lighter/Heat Gun- This will prevent any bubbles in your resin. A candle lighter works great for this. While I prefer a heat gun, it’s not a total necessity for how to make resin numbers.
But if I can make one suggestion I learned the hard way: Do not use matches! The heat from the flame does pop bubbles. but ash can fall into your resin and it’s hard to get out.
Step 2: Mix equal amounts of resin and stir
Always remember to read the directions carefully before doing any mixing.
Different brands will give you different instructions on the amount of time you need to spend stirring and the work time for the resin.
Overall, most resins with a part A and part B require one thing that’s universal in how to make resin numbers: Add equal parts of A and B.
There are two ways you can assure you have an equal amount of both, either use measuring cups or buy a small scale to weigh both parts so they are equal.
I just use measuring cups and find this works best for me!
When mixing resin it’s important to note one thing: The more resin you make at a time, the faster the resin creates a chemical reaction causing it to harden.
I tend to work in two to four Tablespoon increments. I will tell you that pouring resin for numbers 1-9 will take about 4 Tablespoons worth.
Once you’ve combined the two parts together in a cup, stir and keep stirring some more.
Most epoxy resins regardless of brand typically have a mixing time of three or more minutes of consecutive stirring.
If you don’t want to stir for that long, you can always purchase a mechanical resin mixer to save you from carpal tunnel. 😉
Stir together both parts until you see a minimal amount of bubbles and the resin is crystal clear (no cloudiness).
Related Articles:
3 Ingredient Slime Recipe
On-The-Go Sensory Travel Activities
Step 3: Add your extra’s
This is a crucial step because it determines the theme of your resin numbers.
I recommend staying with your child’s interests!
If your child’s favorite color is blue, why not create ocean theme numbers with sequins mermaids, glitter, and tiny shells?
If you’re incorporating glitter be aware that many types of glitter will fall and are not dispersed through the resin. There are two ways to add glitter.
You can either add it to the resin in the cup then pour it in the mold, or pour the resin and then add the glitter.
Here are some more add in extra’s for resin numbers:
-Glitter
-Polymer clay charms
-Candy
-Scrapbook papers
Step 4: Dry and set
Once you have placed all your embellishment in the resin, let it dry at least for 24 hours before removing it from the mold.
If you remove it too early you will bend your numbers.
Step 5: Shave and polish
While you can skip this step as a beginner resin crafter, there are times that call for shaving off the edges after you’ve removed them from the mold.
You can use a metal nail file to file the “sharper” edges.
To polish, use a cotton buff with a polishing compound for resin and buff away any imperfections like cloudy resin edges.
Step 6: Admire and use the resin numbers for learning
Admire your work and watch your child use the resin numbers for number recognition, counting, adding, and subtracting.
You’ll be amazed at how much use your child will get out of these!
Where To Find Resin Numbers
I love making resin numbers and have found the more I make the more inventive and beautiful they become with each set. But the mermaid set below I am especially proud of! They turned out beautiful!


I found a sequin that reminded me of mermaid scales of teal and purple.


This is the backside of the resin number set. To make these numbers I did a layering method of resin pouring. I first poured resin mixed with lavender and deep purple mica powder.
Let that dry for 3 hours, then added sequins with another coat of clear resin till the mold was filled to the top.
Once they completed cured I didn’t have to sand many edges down and they came out AMAZING!

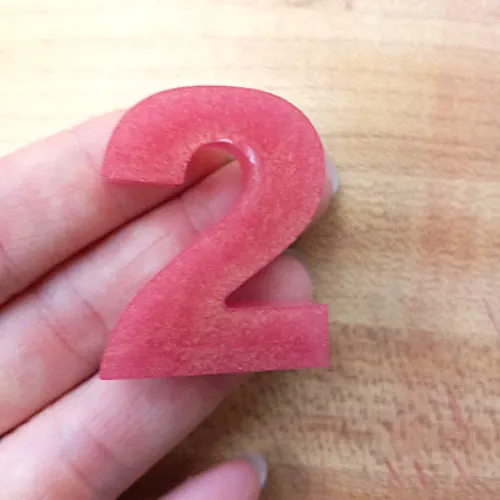
This is another available number set in which I combined a “rose gold” mica powder with resin.

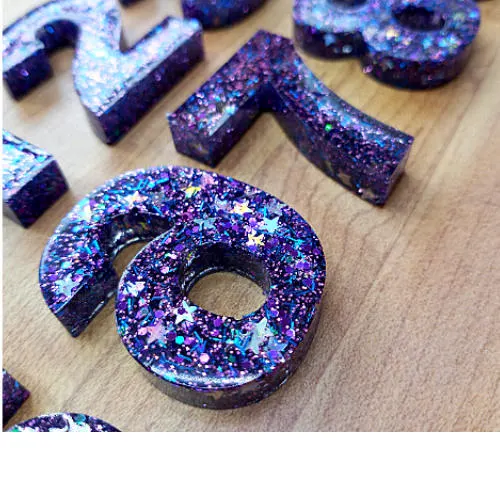
For this “Galaxy” resin set I mixed resin with star glitter and a finer glitter mix of pink, dark blue, and teal.
Final Thoughts
Learning how to make resin numbers is easy than you think! Resin crafting does involve a bit of patience as well as a learning curve.
But you can easily accomplish making resin numbers if you have a passion for learning new crafts and have an imagination you can do it too.
How To Increase Pinterest Traffic - Pitter Patter of Baby Feet
Friday 24th of September 2021
[…] How To Make Resin Numbers: A Beginners Guide […]